With the first batch of parts due to arrive in a few days, the Lasersaur needs a permanent place to sit, which can also double as ideal surface for doing the construction. So before we start building the Lasersaur, let’s build a table!
Size Matters
When it’s done, the Lasersaur will be 67″ × 46″ × 14″ (1700mm × 1170mm × 360mm). While it’s possible to find tables and benches that are long enough, the depth of the Lasersaur creates a challenge. Desk and tables commonly come in depths of 24 to 36 inches. Some large dining tables are as much as 44″ inches deep, but that’s not quite enough. Buying something isn’t a practical option. Since we need to build this, what size should it be?
Wish List
 The table surface should hold the Lasersaur but not be much bigger.
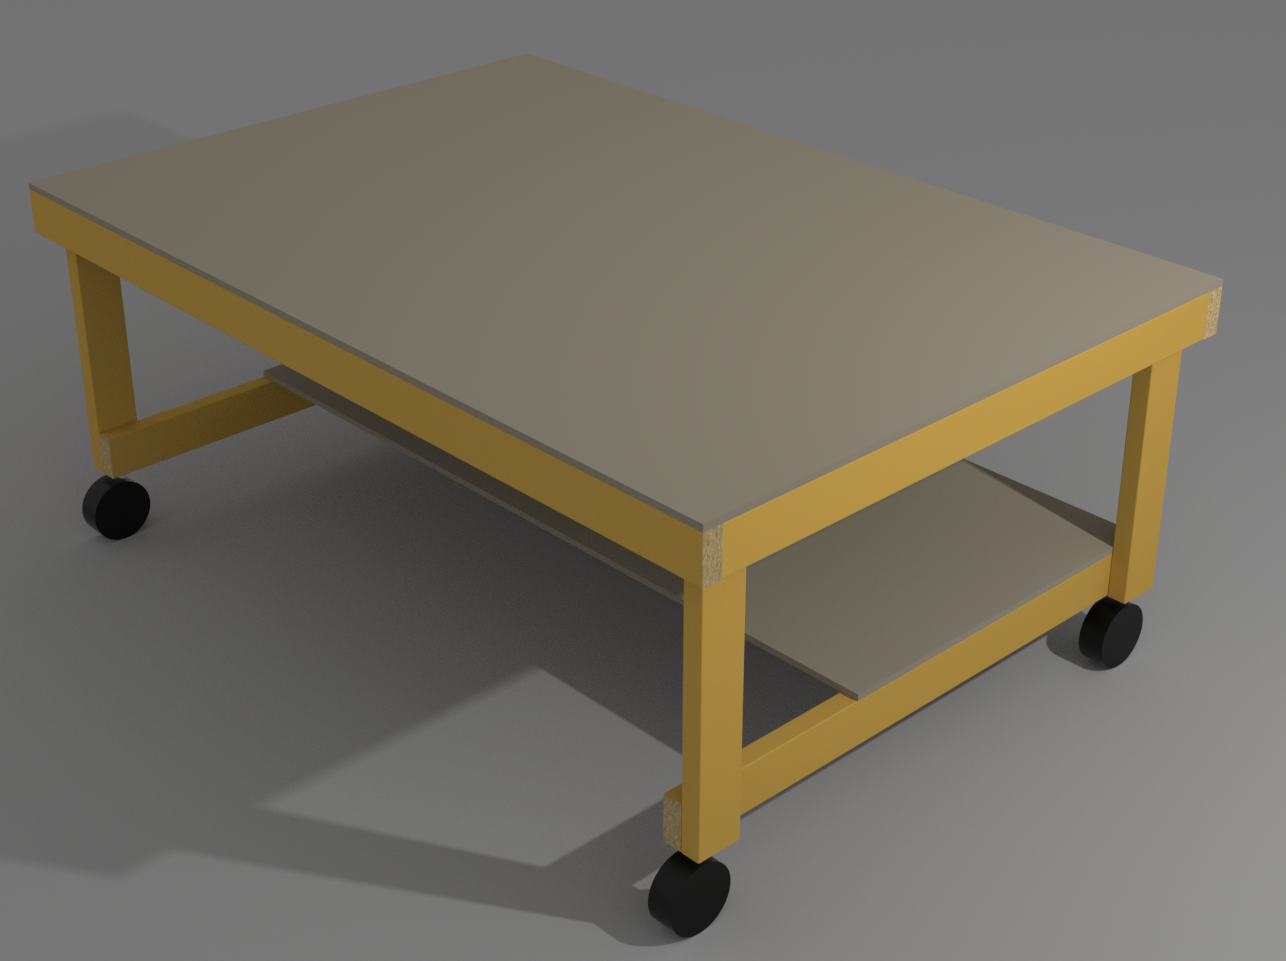
- Our table will be 72″ wide and 49″ deep.
- The tabletop should be a single piece of flat, smooth material.
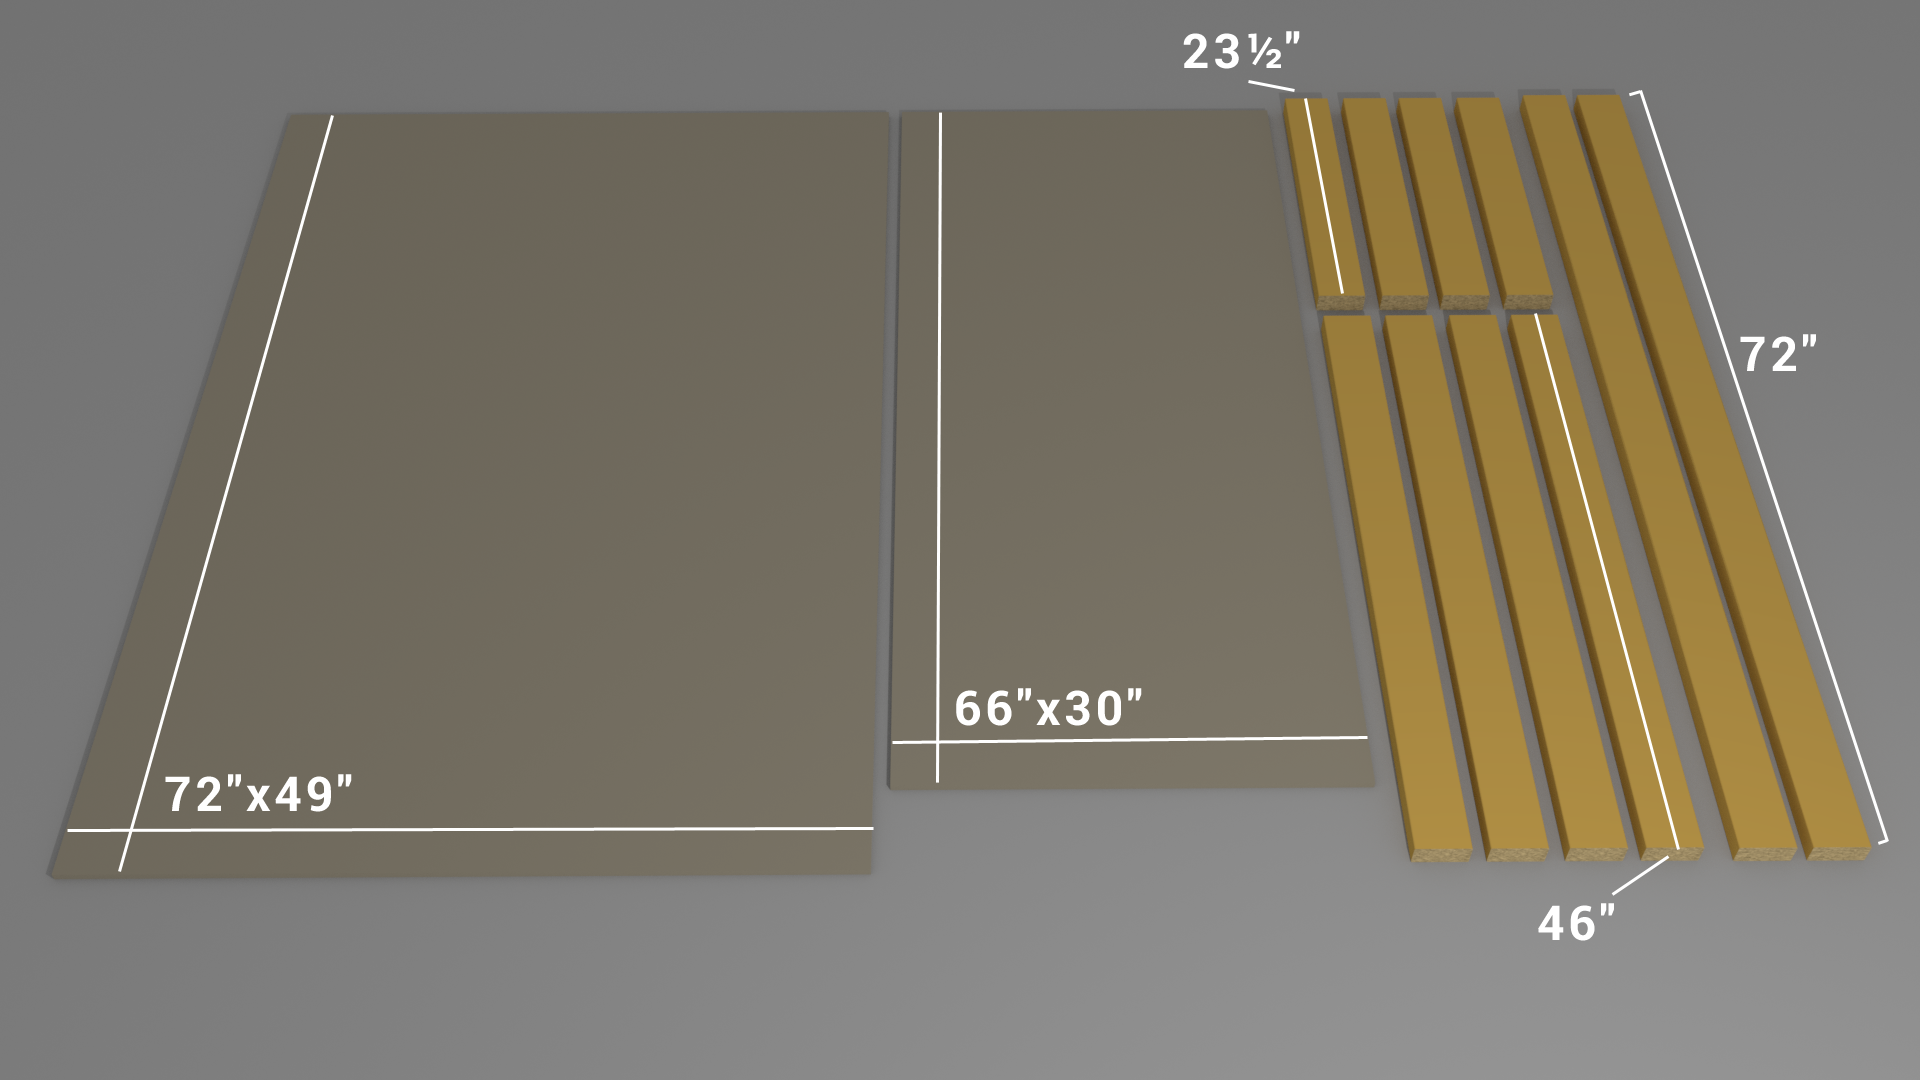
- The top will be a piece of ½” MDF cut down from 96″ × 49″ to 72″ × 49″.
- Working with the Lasersaur should not require reaching up or bending down.
- A final tabletop height of 30″ looks like a good choice.
- The table should also hold the chiller unit, whatever exhaust and air assist systems we install, and 48″ × 24″ material to use with the Lasersaur.
- The table will include a lower shelf which is 66″ wide and 30″ deep.
- The table should be easy to move, fully loaded.
- We’ll install four 5″ locking casters rated for 300lbs. each.
The Design
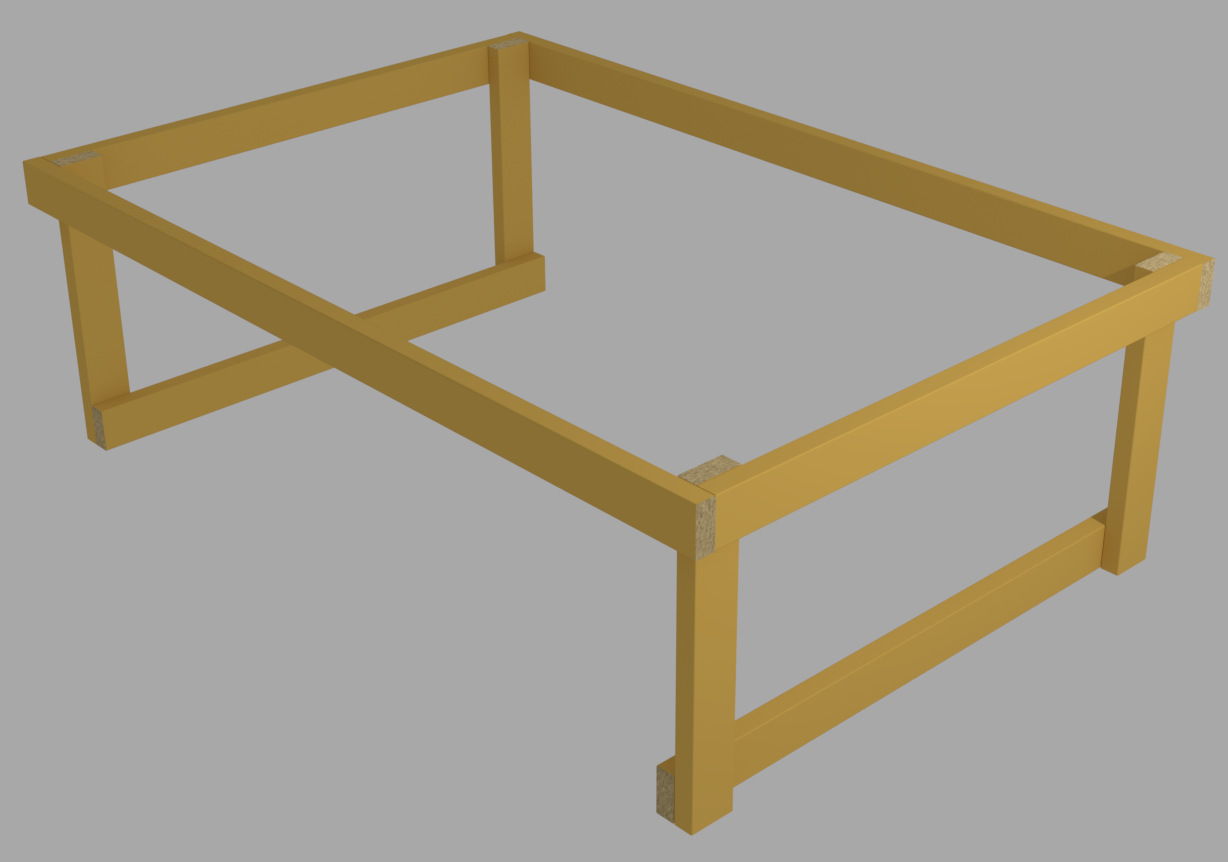 The design is simple and requires only six 8′ 2×4s and two sheets of MDF, plus the casters and wood screws.
A rectangle forms the upper frame and is sized so the 72″ × 49″ MDF top fits it exactly.
All four front-to-back 2×4s are the same length. The lower ones help keep everything square and rigid, support the bottom shelf, and provide enough space to mount the casters.
The Build
Step 1: Get Materials
 The 2×4 studs and the ½” MDF were all picked up at the local home improvement store. We took the time to check each 2×4 to get ones that were as straight as possible and free from edge defects and knot holes.
The ½” MDF came in sheets of 49″ x 96-ish. We had them do three cuts. The first cut brought one sheet down to 72″ × 49″. The other two cuts gave us the 66″ × 30″ piece. Since edges and corners of MDF can get damaged pretty easily, we tried to orient things to keep the most pristine sides and corners.
Step 2: The Top Frame
 We carefully cut two of the 2×4s down to 72″, matching them to the long sides of the top MDF. Then we did the same for the two 46″ pieces, making sure that their length plus the thickness of the first two 2×4s matched the shorter side of the top MDF.
Since all four of the front-to-back pieces needed to be the same length, we used one of them as the template for the other three.
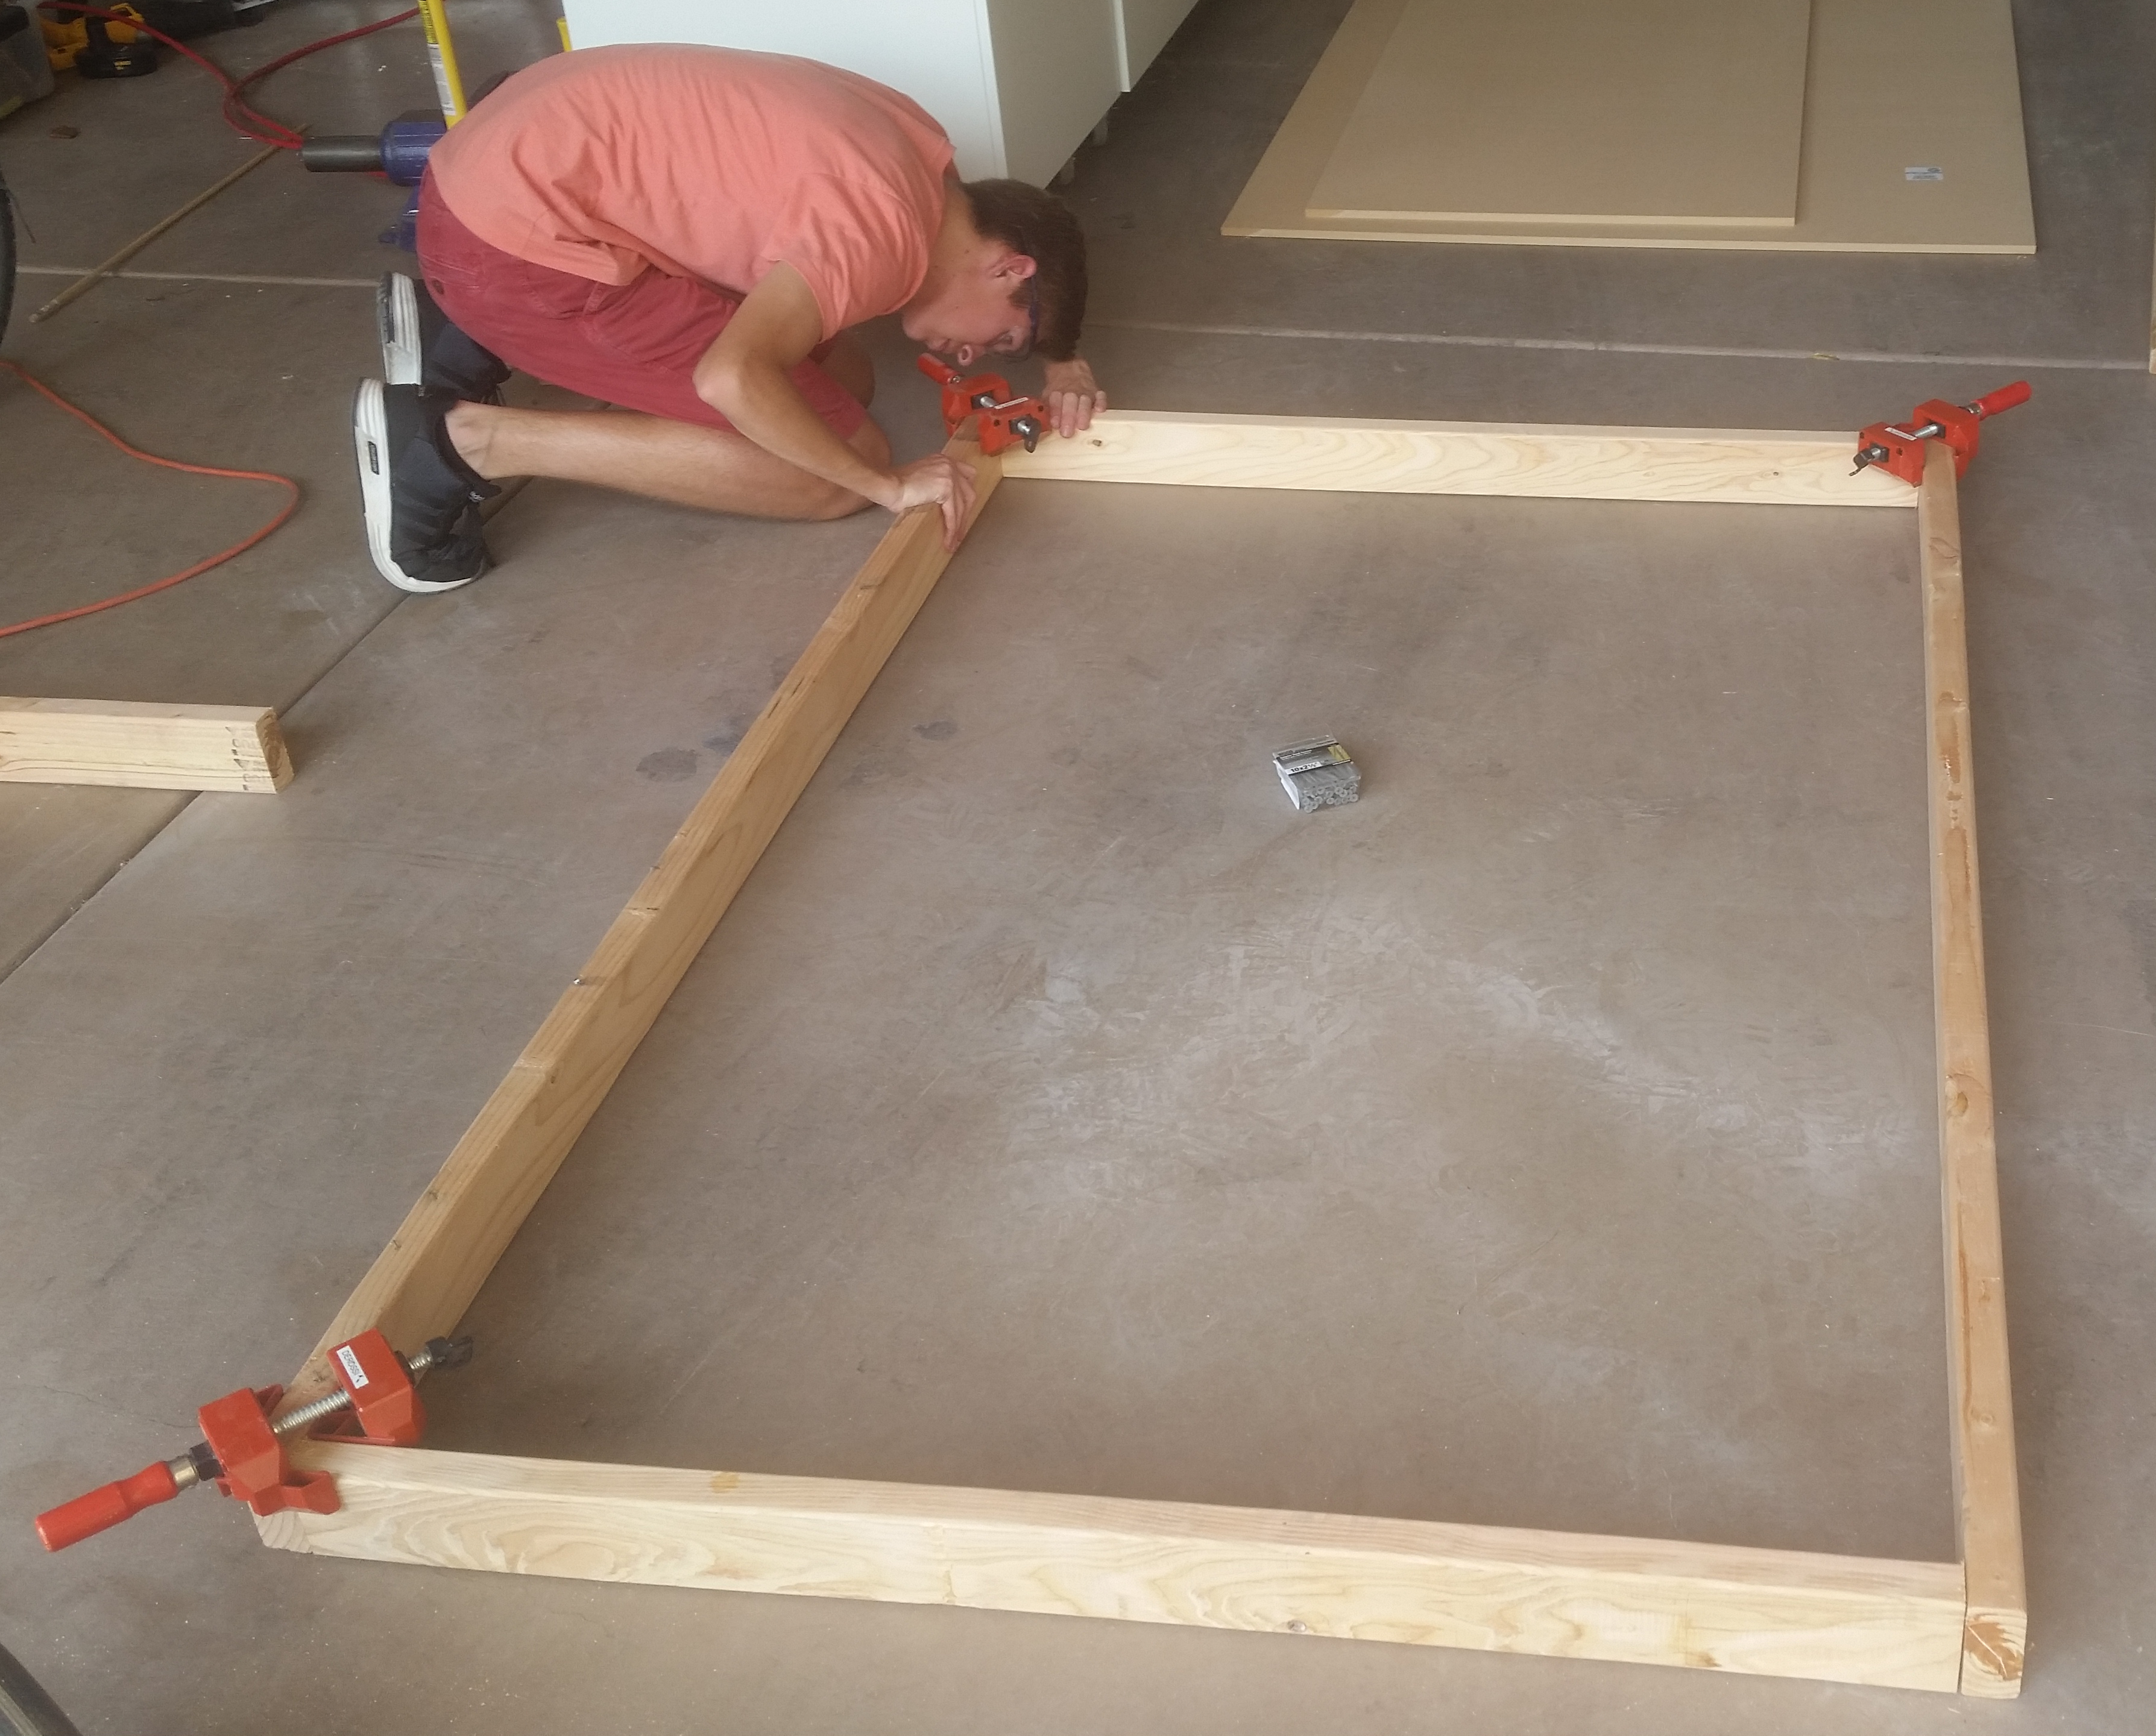
Using these awesome corner clamps and 2½” wood screws, we fastened the top frame together on a flat part of the garage floor.
Step 3: The Top
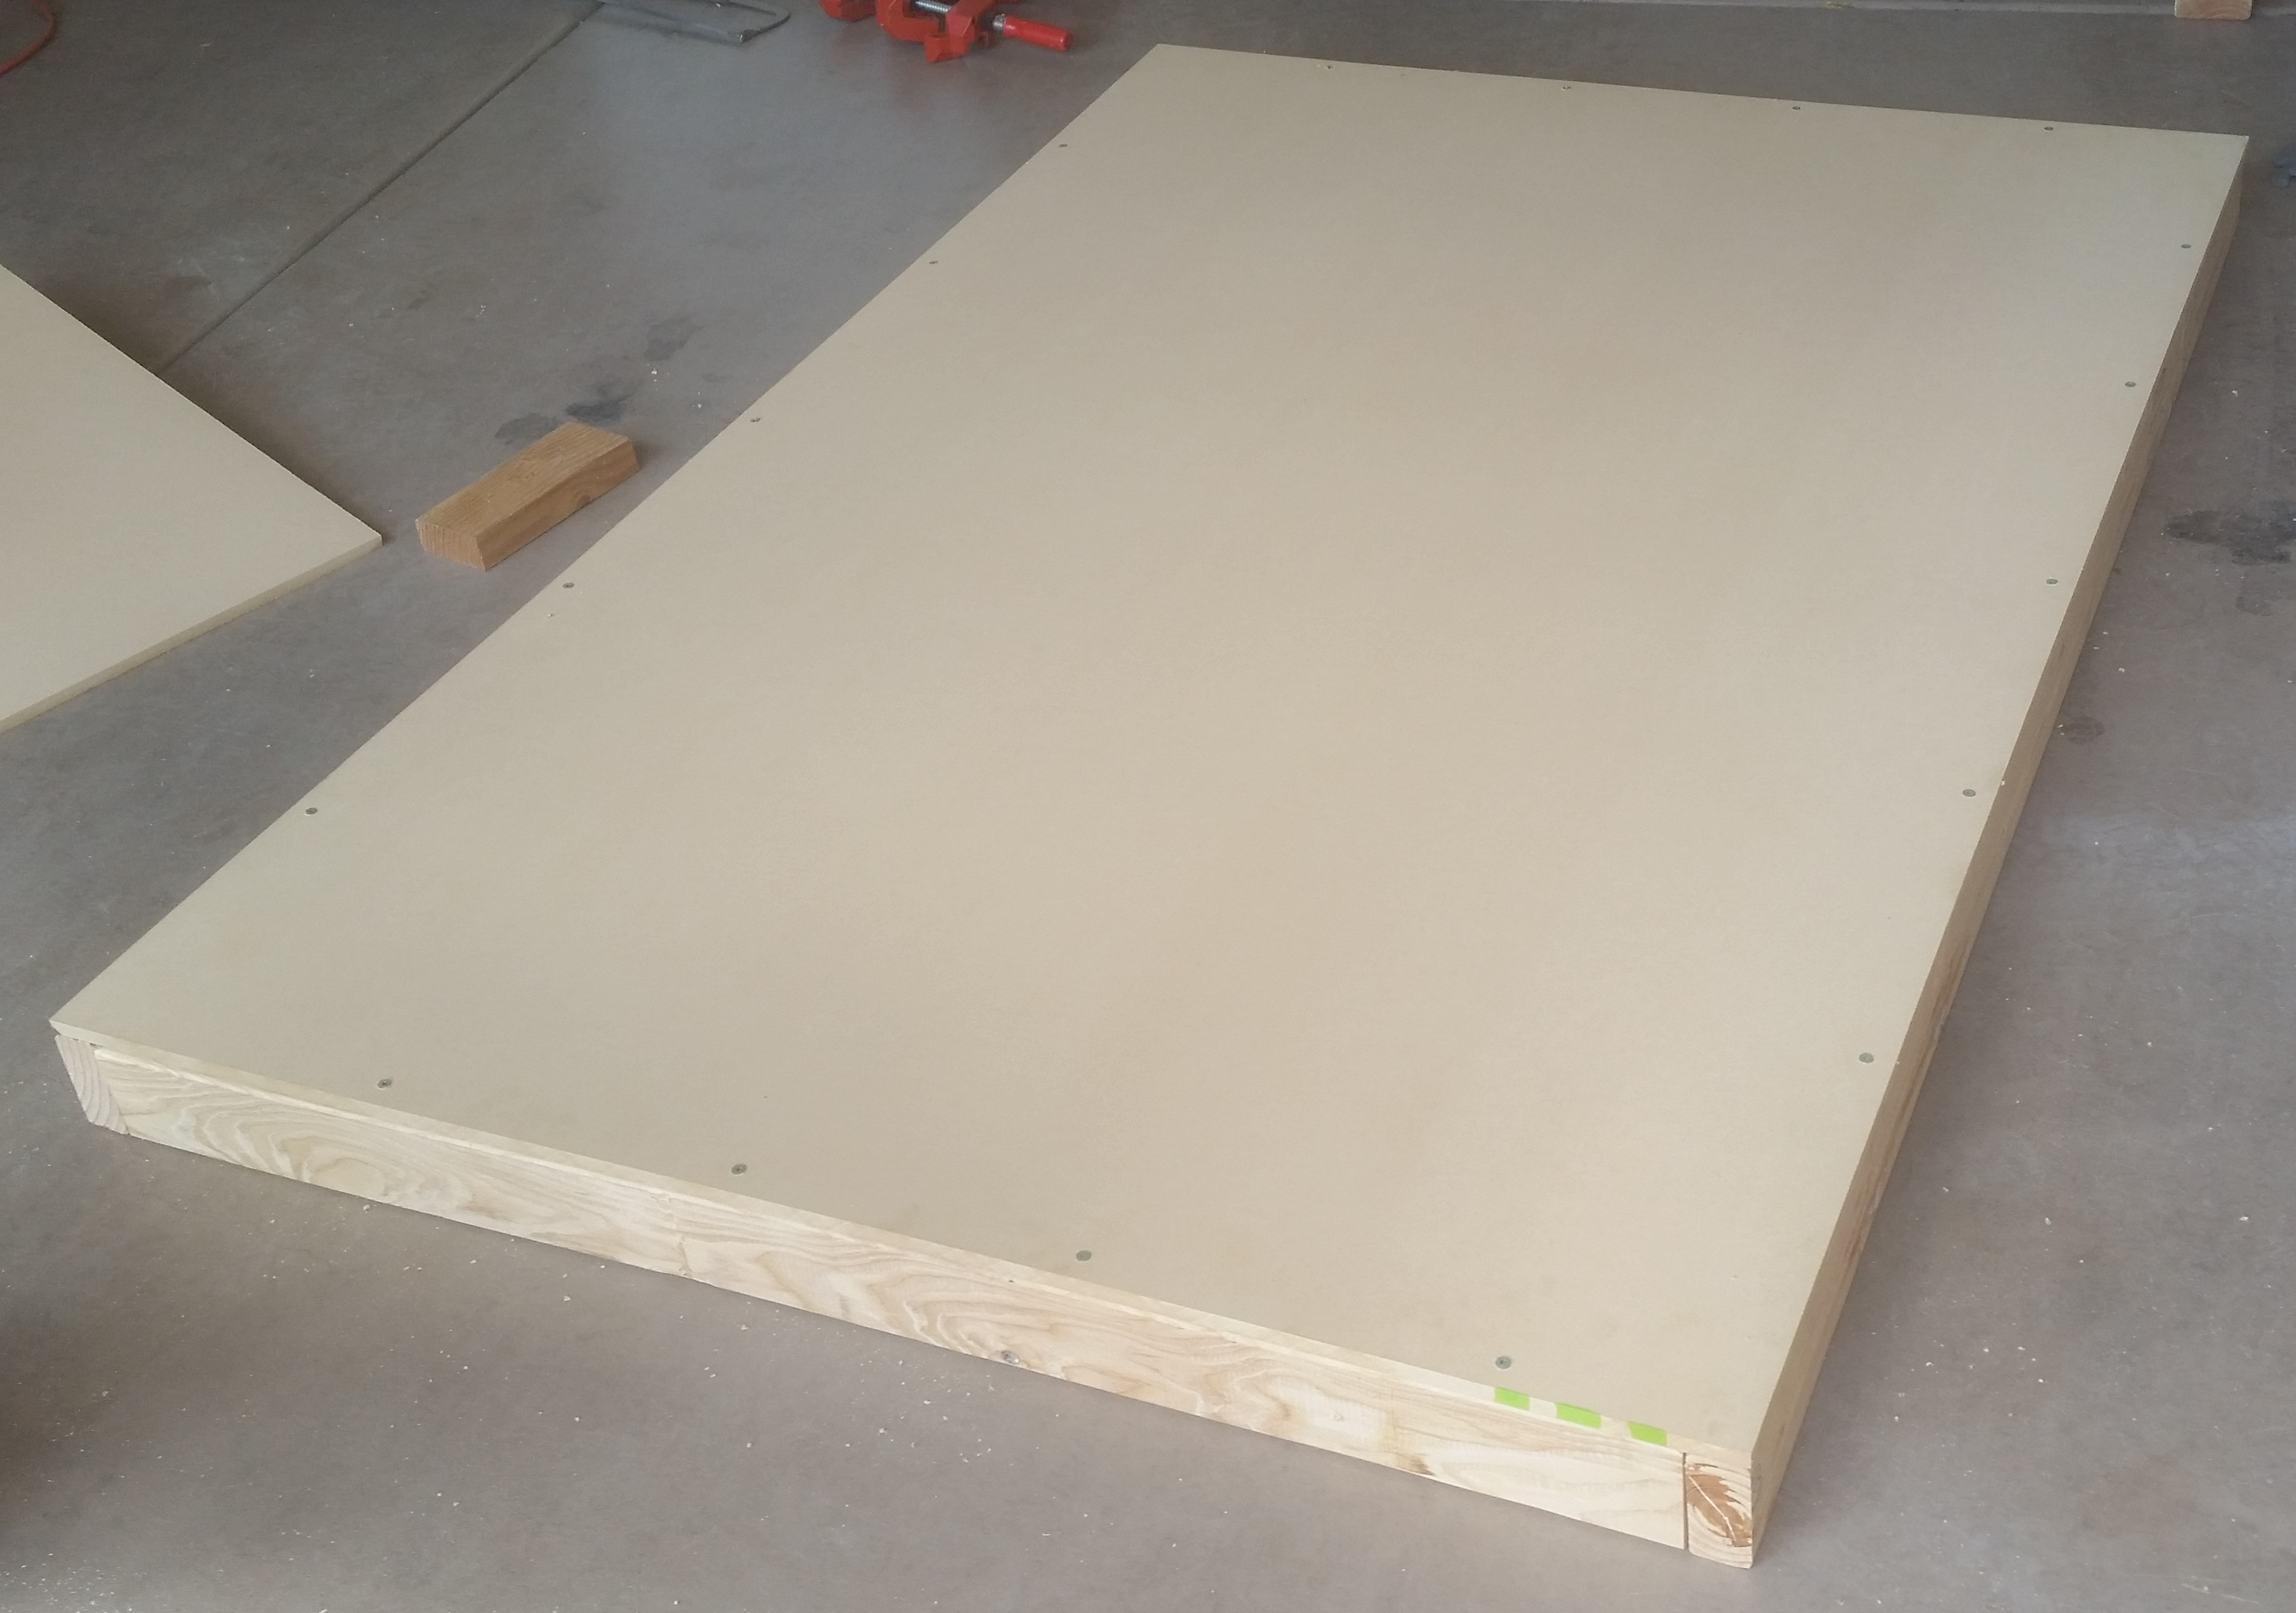 Here’s the top MDF secured to the frame.
Step 4: The Legs
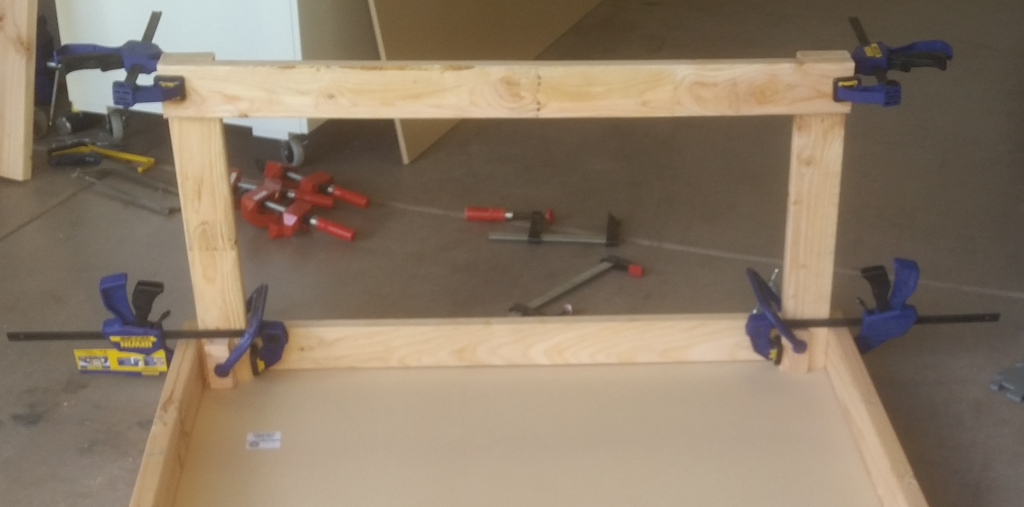

For a total table height of 30″, using a ½” MDF top and casters that are 6″ in total height, we cut four 2×4s to 23½”. The exact length wasn’t critical, but for the table to be level, all four legs needed to be the same length. So after setting up the saw for 23½”, we cut all four 2×4s together as a single bundle.
To attach the legs and the lower front-to-back studs, we turned the top upside down and clamped the legs in tightly against the top frame. We attached the cross studs, making sure they were exactly flush with the ends of the legs. Once one side was complete, we repeated the procedure on the other side.
Step 5: Bottom Shelf
The bottom piece of MDF was attached to the lower studs at each end. It fit snugly between the rear legs of the table.
Step 6: The Casters
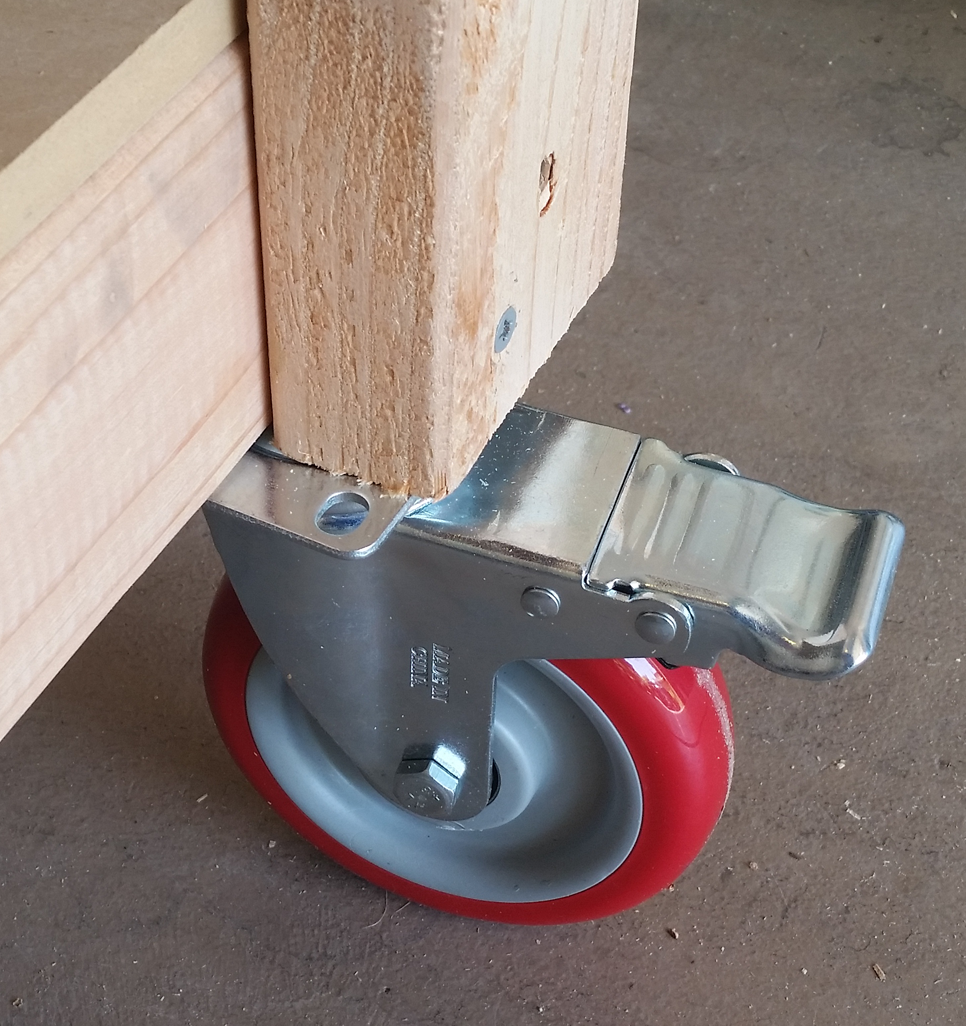 The casters mounted easily to the surface comprised of the bottom of each leg and the cross piece. However, the plates on the casters were unexpectedly larger than 3½”, so the 3½” × 3″ area was not large enough to use all four holes. We secured each stud with three wood screws and may revisit them later.
Results
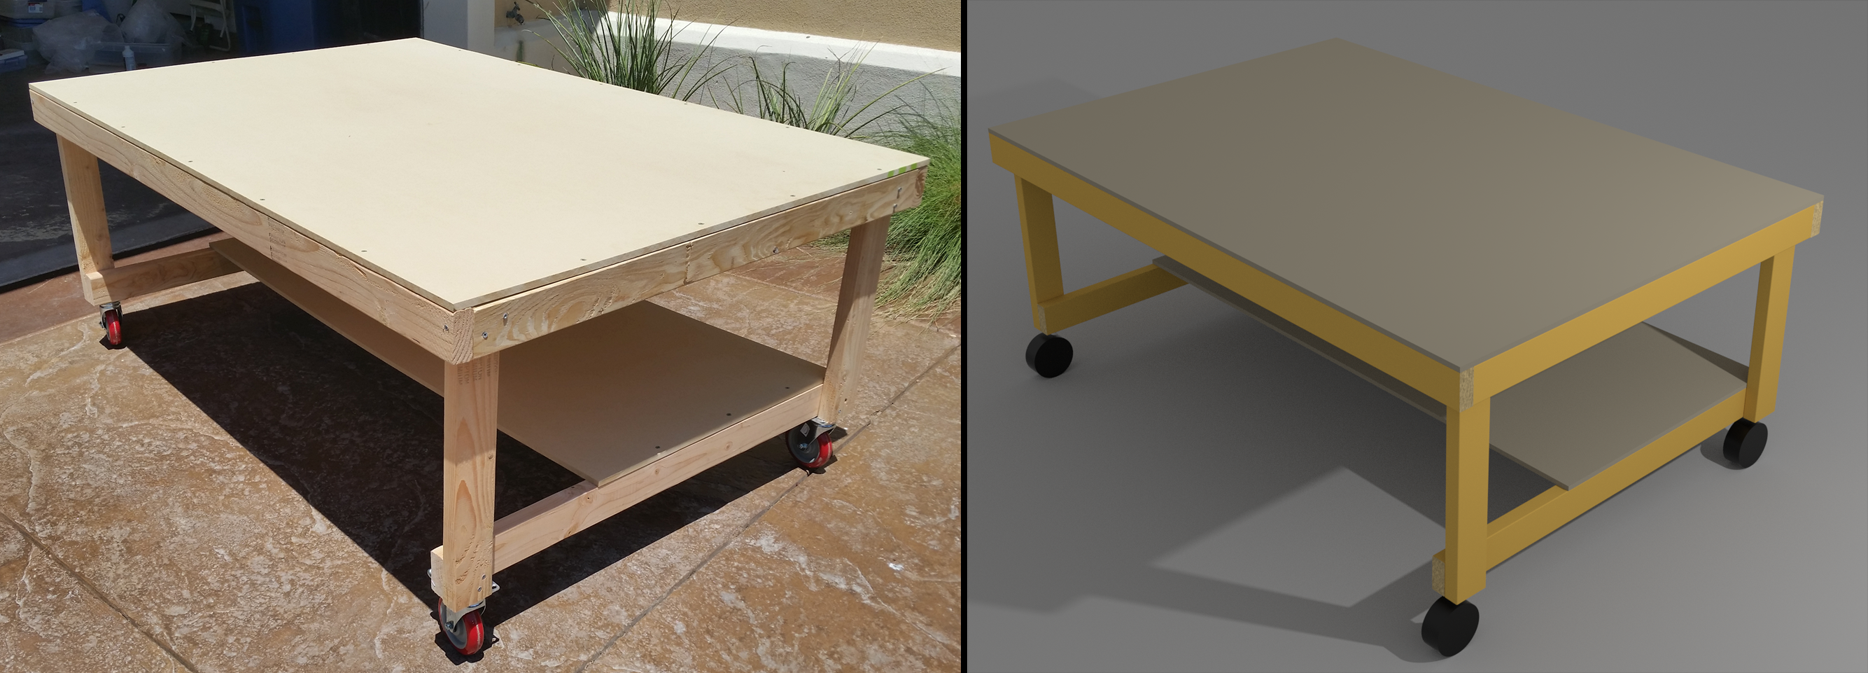
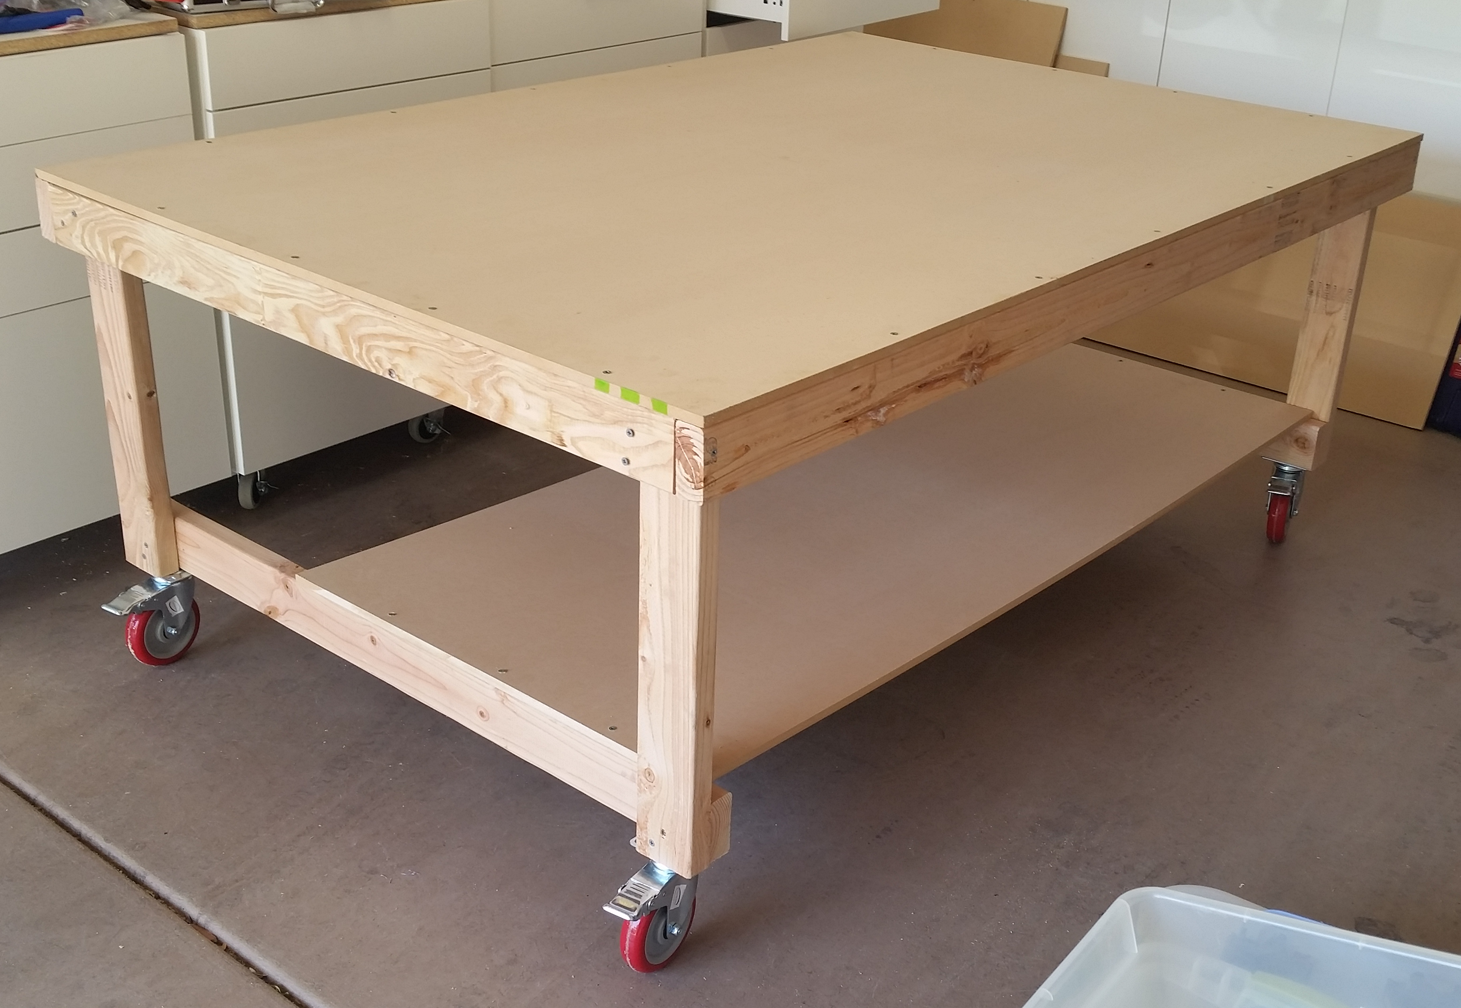 Overall, the table is sturdy, level, and rigid. It rolls very easily on its 5″ casters, including when going over the gaps between sections of concrete floor. For a total of about two hours build time, the results are very satisfying.
The original intention was to paint it white. But painting MDF properly requires several steps, especially to seal the edges which will otherwise soak up the paint. In the interests of moving on to the actual Lasersaur, painting the table will go on the infinitely long list of future projects.
Mistakes and Issues
In addition to the insufficient surface for mounting the casters mentioned above, a couple problems were apparent after the table was finished.
Both the top surface and the lower shelf are not supported well enough. The top might be OK, but the center just doesn’t feel strong enough. Since this is only going to hold the Lasersaur, which will have much of its weight distributed over the front and back framing studs, it would probably be fine. It’s certainly strong enough to use temporarily for building the Lasersaur frame.
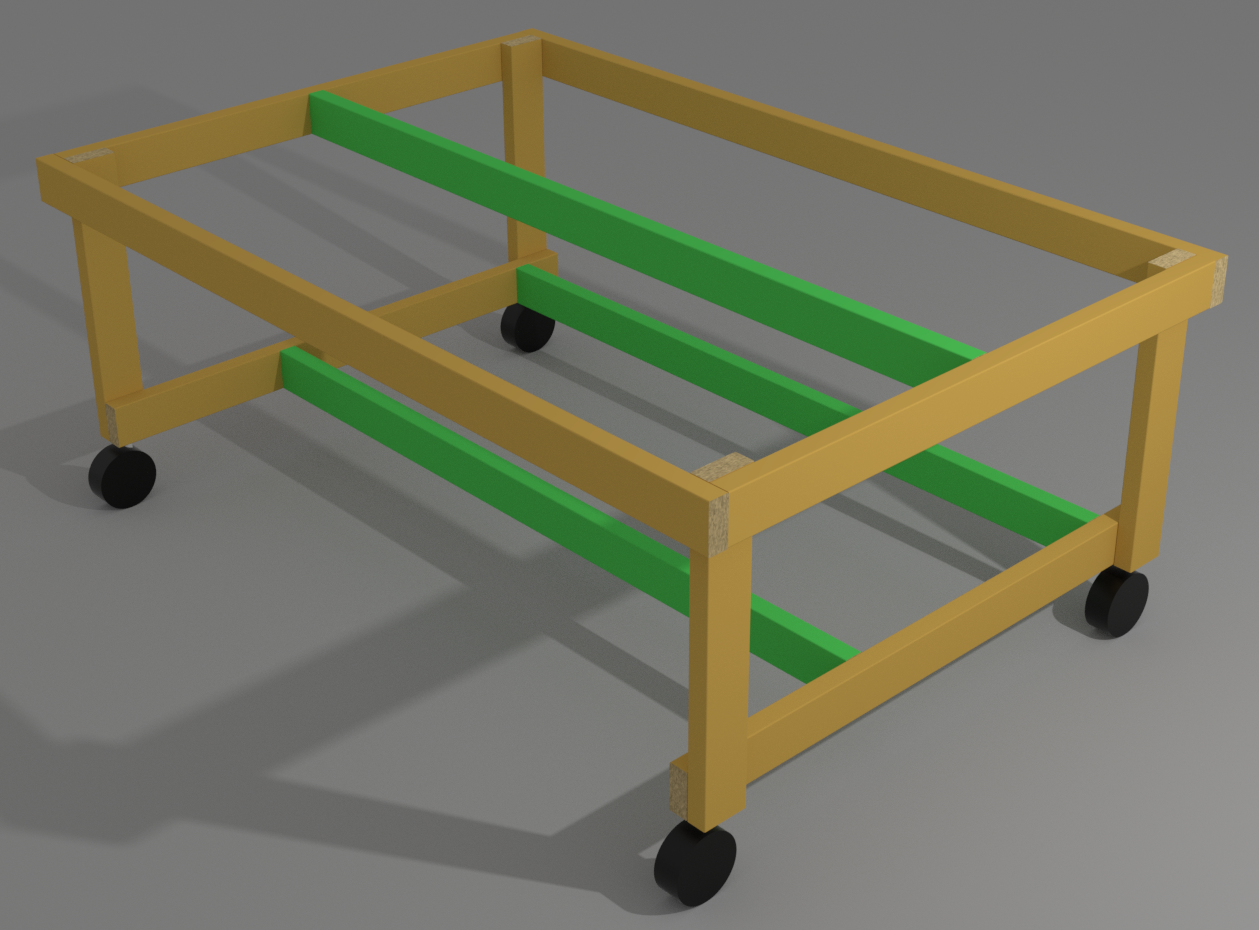 The bottom shelf is a much bigger problem. The design to have it supported only at its ends, spanning 66″, was just silly. Perhaps if the MDF were a full inch instead of ½”, it might be strong enough. But the chiller for the laser arrived right after the table was completed. Judging by its weight before adding water, it would snap the MDF even if placed at one end. So the shelf needs additional support.
To fix these problems, three more 2×4s will be added, as shown in green here.
Hey Chris! Did you ever get around to building the Lasersaur? I’m looking at building one for a university UAV club and was hoping to find some recent build examples with final price estimates.
Hey John,
Yes! It’s still in progress, but getting very close. I’ve been tracking all the expenses and taking pictures at every single step of the assembly process. It’s been a great project so far.
I’ll see if I can catch up on my posts and get something up soon. Meanwhile, here’s a quick picture of where things stand right now.